


















































DIY French tip nails are a timeless beauty trend that combines elegance, simplicity, and versatility. With their natural-looking base and distinctive white tips, French manicures complement almost every outfit and occasion. Whether you are preparing for a wedding, a special event, a vacation, or everyday wear, this classic nail design offers a polished appearance without requiring an expensive salon appointment.
The best part about creating a French manicure at home is that you can customise the colours, shapes, and finishes to match your personal style. Beginners can start with traditional white tips, while more experienced nail enthusiasts can experiment with colourful edges, glitter, and modern designs. With the right tools, a little patience, and the techniques explained in this guide, you can achieve beautiful results from the comfort of your home.
What Are DIY French Tip Nails?
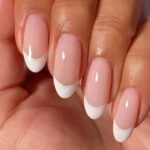
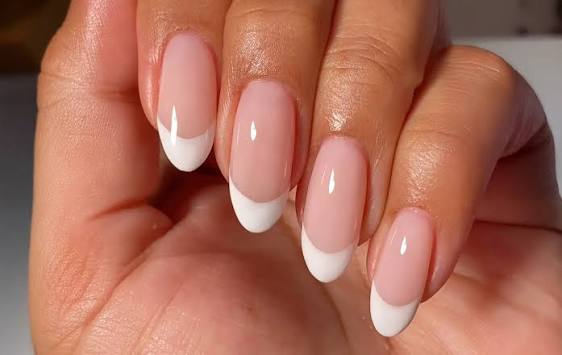
DIY French tip nails are manicures created at home using the classic French manicure design or one of its modern variations. The traditional style features a sheer pink, nude, or milky base with a clean white line along the free edge of each nail. This combination creates a natural, sophisticated look that works with short, medium, and long nails.
Modern French manicures offer far more variety than the original design. You can choose coloured tips, metallic finishes, delicate glitter, or contrasting shades for a more creative appearance. Some people prefer thin micro-French tips for a subtle effect, while others choose thicker edges to make their nails stand out. This flexibility makes the design suitable for different tastes and skill levels.
Essential Tools for a DIY French Manicure
Preparing your supplies before beginning makes the process easier and helps you achieve a neater finish. You will need a nail file, a buffer, a cuticle pusher, a base coat, a sheer nude or pink polish, white nail polish, and a clear top coat. A small detail brush, French tip guides, or a makeup sponge can also help you create a precise line.
Choose nail products that suit your preferred manicure method. Regular nail polish is convenient for beginners because it dries naturally, while gel polish requires a compatible curing lamp and appropriate application products. If you use gel polish, follow the manufacturer’s safety instructions and avoid getting uncured product on your skin, as repeated exposure can cause allergic reactions.
How to Prepare Your Nails Before Painting
Good preparation is the foundation of a professional-looking manicure. Begin by removing old polish and washing your hands thoroughly. File your nails into your preferred shape, such as square, oval, almond, or squoval. Gently push back the cuticles without cutting living skin, then lightly buff the nail surface if your chosen products require it.
Next, remove any dust and surface oils according to the polish manufacturer’s instructions. Apply a thin layer of base coat and allow it to dry completely, or cure it as directed if you are using gel products. Proper preparation helps the polish adhere evenly and reduces the likelihood of premature chipping or peeling.
Step-by-Step DIY French Tip Application
Start by applying one or two thin coats of sheer pink, nude, or milky polish to create the base. Allow each coat to dry before continuing. Thin layers generally produce a smoother finish than one thick application, which can become uneven or take longer to dry.
Once the base is ready, paint the white tips using a fine nail art brush or French manicure guides. Follow the natural curve of each nail, keeping the line consistent in thickness. If you make a small mistake, use a fine brush dipped in an appropriate polish remover to tidy the edge. Finish with a clear top coat to add shine and help protect the design.
Easy DIY French Tip Techniques for Beginners
French tip guides are particularly helpful if you struggle to draw smooth lines by hand. Place the guide across the nail so that only the tip remains exposed, apply your white polish, and carefully remove the guide while the polish is still at the appropriate stage for a clean edge. Always check the product instructions and allow sufficient drying time before applying your top coat.
Another beginner-friendly method uses a small detail brush to draw the smile line first, then fill in the remaining tip. You can also practise on a nail art practice wheel or a piece of plastic before painting your natural nails. Remember that consistency improves with practice, so your first attempt does not need to look perfect.
Popular DIY French Tip Nail Designs
Classic white French tips remain popular because they create a clean, understated manicure. They pair beautifully with sheer pink, beige, and milky-white bases, making them suitable for work, formal events, and everyday activities. A thin white edge is especially attractive on shorter nails because it creates a refined appearance without overwhelming the nail.
For a modern alternative, experiment with colourful French tips in shades such as red, blue, pastel pink, or green. Glitter tips add sparkle for celebrations, while chrome or metallic edges create a contemporary finish. Reverse French manicures, which place colour near the cuticle rather than the nail tip, offer another creative variation. Choose a design that complements your nail shape and personal style.
Common Mistakes to Avoid When Creating French Tips
One frequent mistake is applying too much polish at once. Thick layers can create bumps, smudges, and uneven drying. Using small amounts of polish and building the colour gradually gives you more control. It is also important to let each layer dry properly before applying another product, especially when working with regular nail polish.
Another common problem is making the white tips inconsistent in shape or thickness. To improve symmetry, use the same brush angle on each nail and work slowly. Avoid filing or buffing the natural nail excessively, and never peel off gel polish because doing so can damage the nail surface. Gentle preparation and careful removal help keep your nails healthy.
How to Make Your DIY French Tips Last Longer
A quality base coat and top coat can improve the appearance and durability of your manicure. Apply polish in thin layers and seal the free edge of each nail with a small amount of product where appropriate. Avoid flooding the cuticles with polish, as this can encourage lifting and make the manicure look less tidy.
Daily nail care also makes a difference. Apply cuticle oil regularly, moisturise your hands, and wear protective gloves when cleaning or washing dishes. Avoid using your nails as tools to open packages or scrape surfaces. If you use gel polish, remove it according to the manufacturer’s instructions rather than picking or peeling it away.
Conclusion
DIY French tip nails are an accessible way to enjoy a classic manicure without the expense of regular salon visits. With basic nail tools, careful preparation, and a steady application technique, you can create a clean and elegant design at home. Starting with traditional white tips is a great way to develop your skills before exploring colourful finishes, glitter accents, and other creative variations.
The key to a beautiful French manicure is patience, thin polish layers, and attention to detail. Choose products suitable for your nails, practise your technique, and maintain your manicure with regular moisturising and gentle care. Over time, you will become more confident in creating French tips that look polished, suit your personal style, and last as long as your nail products allow.
